Managing labels
By default, all new Edge Devices have no labels assigned to them. You have the possibility to assign 1 or more labels to several Edge Devices. In that way, you group your Edge Devices.
Creating new labels
-
Click the
 icon.
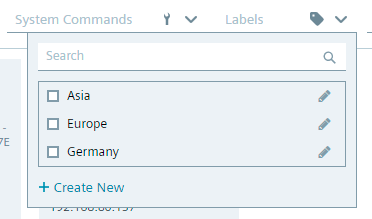
All existing labels are displayed.
icon.
All existing labels are displayed.
-
Click
Create New. TheNew Labelscreen is displayed. -
In the
Nameinput field, enter the name of the label.
Note Subgrouping labels Once you have created a label, the
New Labelscreen has a different layout. If you want to subgroup a label to another label, select theNest label undercheck box and select the parent label from the drop-down list.
- Click
Create. The label is created.
Assigning labels to Edge Devices
-
Click the
 icon of the Edge Device for which you want to assign a label.
 -
Click
Manage Labels. TheManage Labelsscreen is displayed. -
Select the label you want to assign to the selected Edge Device.
-
Click
Apply. The label is assigned to the Edge Device. When you switch to the table view, all assigned labels to an Edge Device are additionally displayed.