Deploying IEM Pro
To deploy the IEM Pro on an existing K8s cluster, you must perform the following tasks:
- Deploying IEM Pro
- Create an IEM Instance in the Industrial Edge Hub
- Download and Install the IE Provisioning CLI
- Install the IEM Pro on the K8s Cluster
- IEM Pro Deployment
To create a Kubernetes cluster, refer to Using kOps or Using minikube.
Create an IEM Instance in the Industrial Edge Hub
-
Log into the Industrial Edge Hub.
-
Navigate to
IEM Instancesand clickCreate New IEM Instance. -
Enter the name and optional description of the IEM instance.
-
Click
Save.The IEM instance has been created.
-
Click the download icon to download the configuration file of the newly created IEM instance.
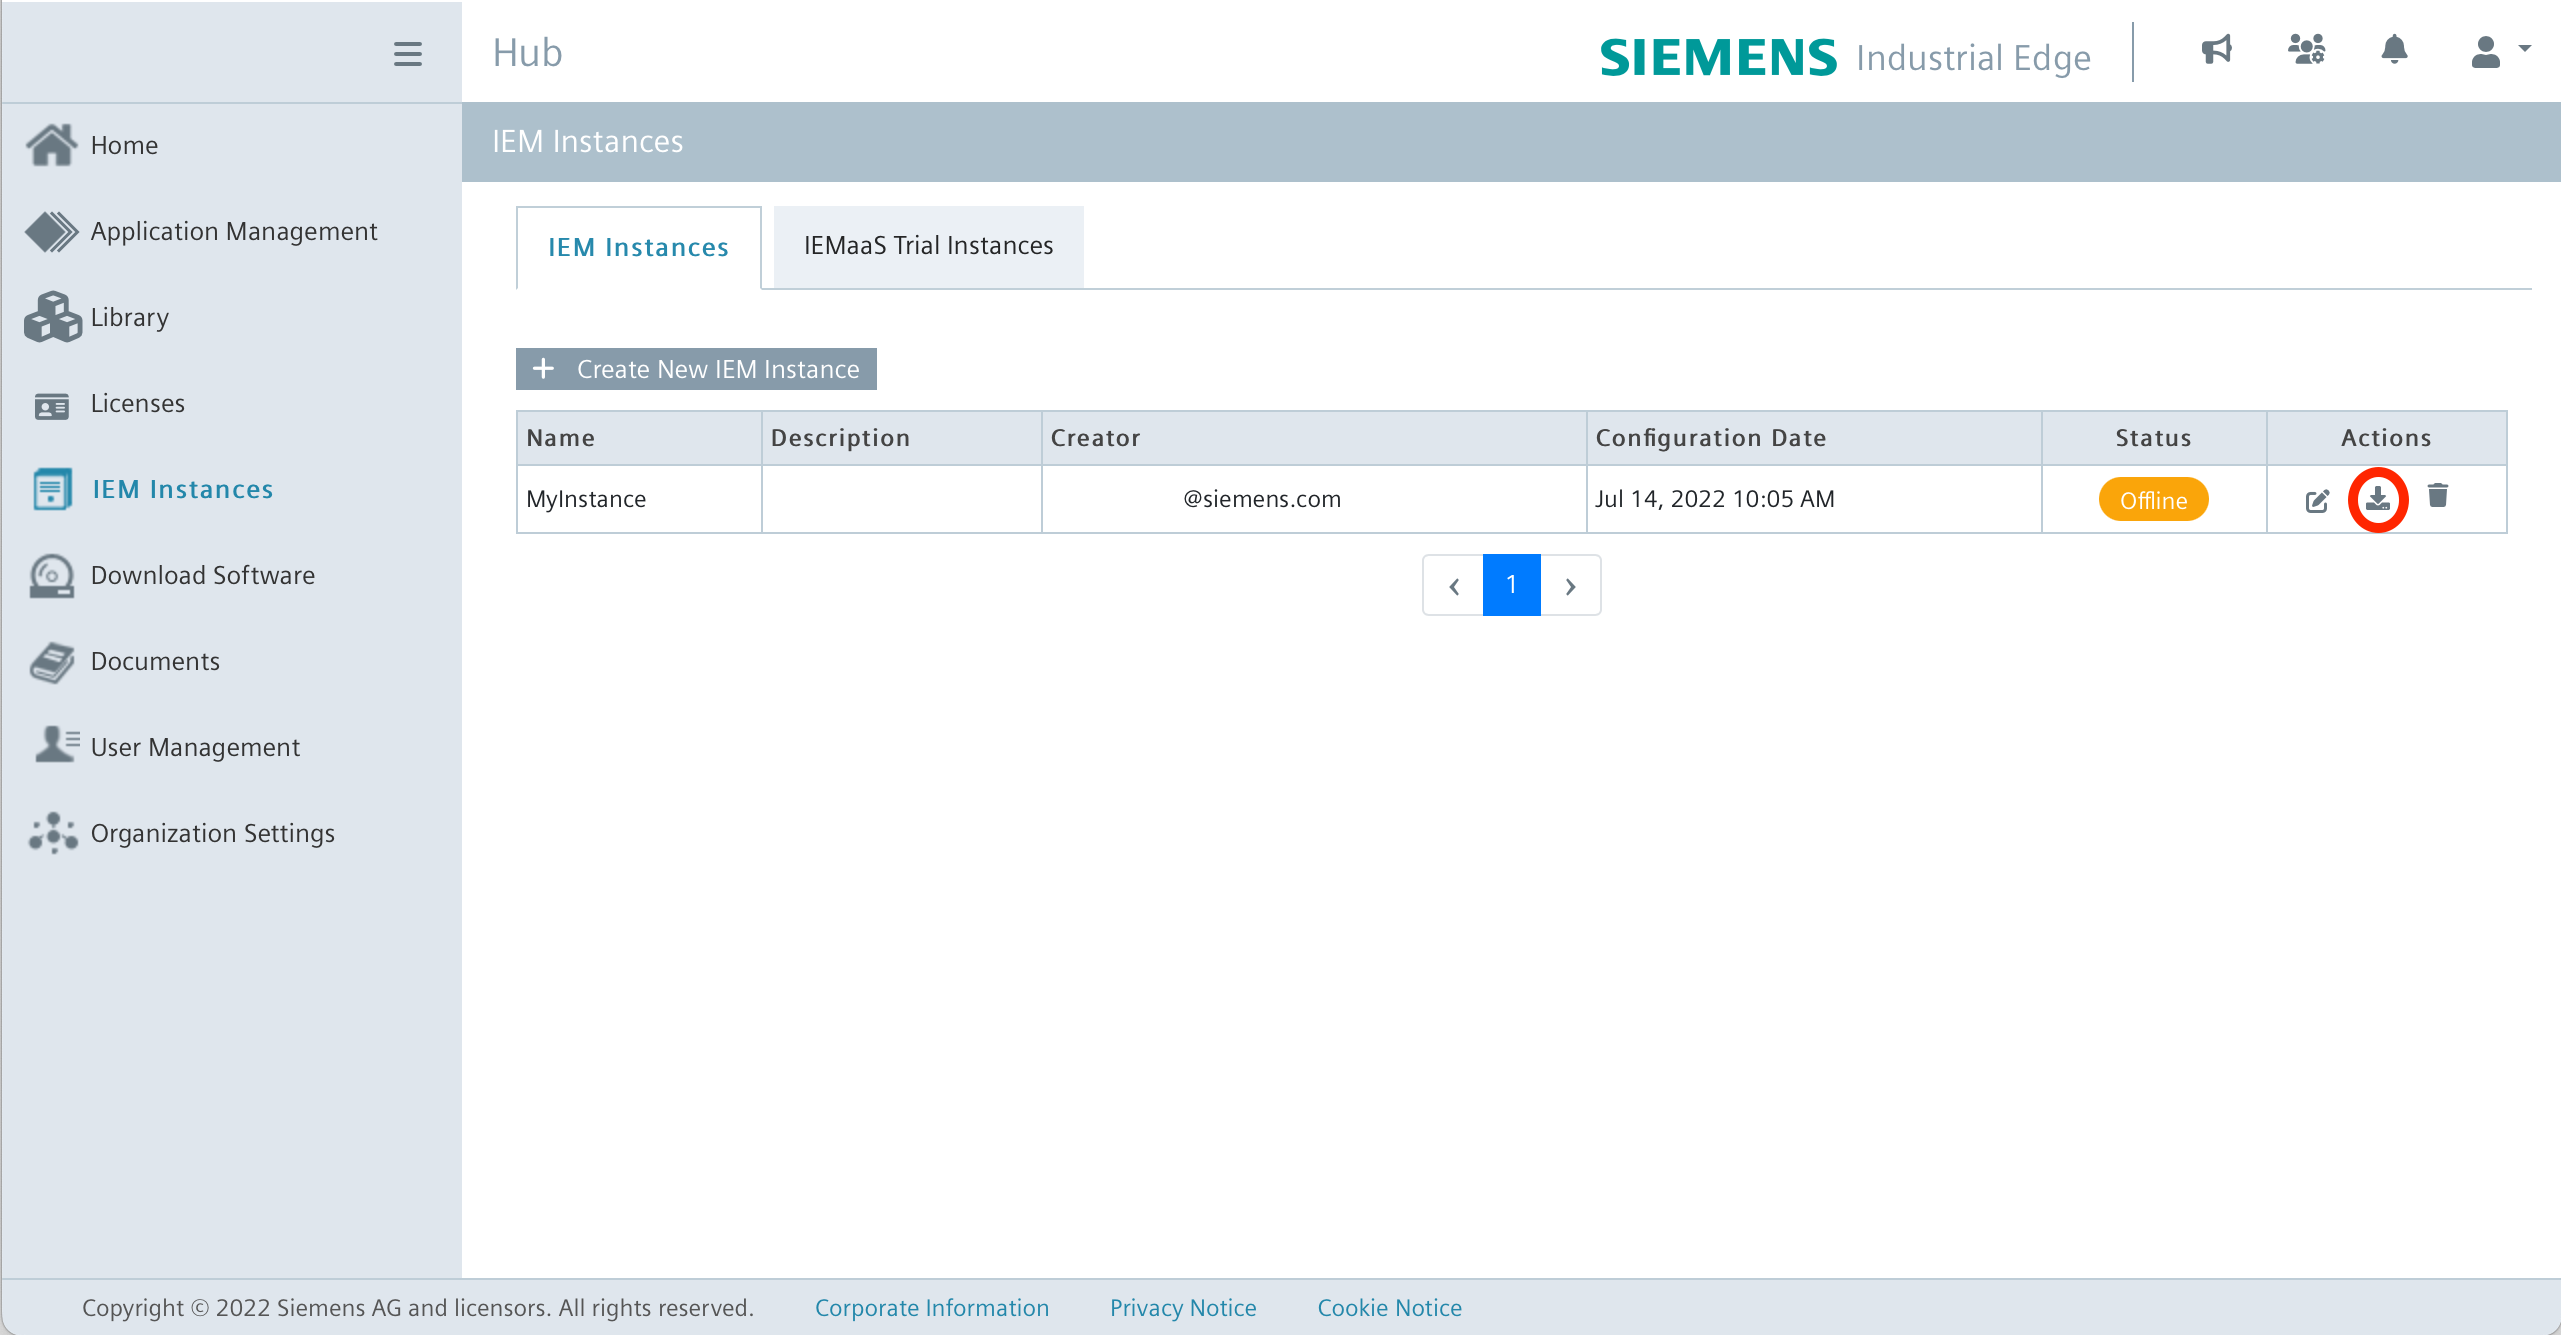
Note After downloading, the configuration file is valid only for 1 hour.
The configuration file looks like this for example:
Example configuration file
config.json{ "deviceId": "102ea1489b76473596ef4911d2a88ab4", "deviceName": "MyInstance", "deviceCreator": "deviceCreator@siemens.com", "description": "", "deviceValidateKey": "eyJhbGciOiJQUzI1NiJ9.eyJpYXQiOjE2NTc3ODYwMjgsI...", "potalUrl": "portal..edge.siemens.cloud:443", "nodeId": "b6da72ea386d4963abb384e0fb1bef66", "platformId": "d522704551ed4182892d01d896e53bf1", "userId": "d122e802a3314e828a02453d239708c4", "iems": { "iemsAppId": "f139d6d8cb384bb08fd2b16ce8d8e2e9" }, "isDeviceBuilder": false, "isTestDevice": false }
Download and Install the IE Provisioning CLI
- Log into the Industrial Edge Hub.
China Region
For users in China region please log into the Industrial Edge Hub China.
-
Navigate to
Download Software. -
In the
Industrial Edge Provisioning CLI - Ubuntutile, clickDownload. The IE Provisioning CLI for Linux is downloaded to your Internet browser's default download folder. -
To execute the IE Provisioning CLI, install the binary:
sudo install ieprovision /usr/local/bin/
To provision the IEM from Windows use the IECTL
Use iectl provision install insted of ieprovision install
Install the IEM Pro on the K8s Cluster
To install the IEM Pro it is necessary to have the ieprovision CLI installed.
The host system running ieprovision needs internet access to reach the domains listed in Contacted domain names and connection to the Kubernetes cluster at the same time.
For the installation the kubeconfig in ~/.kube/config is used and environmenmt variables will be ignored.
Note Set the context of the cluster by using
kubectl config use-contextto the right context for the installation.
Since the installation depends heavily on the infrastructure, such as whether a proxy is used or how exactly the IEM Pro will be accessed later, several parameters must be set. It is recommended that you read the IE Gateway documentation beforehand, as well as the documentation on TLS Termination. There is some information included, and depending on the setup, it is necessary to set some additional parameters during the installation. It's also necessary to specify the correct FQDN (Fully Qualified Domain Name) or IP during installation, otherwise the IEM Pro will not be reachable after deployment.
In the Helm Chart reference all default values can be seen.
In any case, it should be checked which storage class is being used (kubectl get storageclass).
And it's also very important to set the right proxy values (see Configuring a Proxy via Provisioning CLI).
To install the IEM Pro, there is an Install using templates function and also an Install using bash command.
Both do the same thing, but in different ways. For anyone without experience with a CLI, it is recommended to use the template onboarding.
Use the template command to create a quickstart configuration file:
ieprovision template > template.yaml
This command creates an example template.yaml in the current directory of the terminal:
Example template
central-auth:
  keycloak:
    customerRealmAdmin:
      #
      # Email of the initial IEM admin
      email: customer.admin@siemens.com
      #
      # first name of the initial IEM admin
      firstName: customer
      #
      # last name of the initial IEM admin
      lastName: admin
      #
                # username of the initial IEM admin
      username: customer_admin
      initialUser:
                #
                # email of the initial keycloak user
        email: iem.user@siemens.com
                #
                # Enable creation of the initial IEM user
        enabled: true
                #
                # first name of the initial keycloak user
        firstName: iem
                #
                # last name of the initial keycloak user
        lastName: user
                #
                # username of the initial keycloak user
        username: iem_user
  global:
    #
    # Application Secret Key
    applicationSecretKey: ""
    #
    # Password for Customer Realm Admin
    customerAdminPassword: ""
    #
    # Password for database user
    databaseUserPassword: ""
    #
    # Hostname for accessing the IEM
    hostname: ""
    #
    # Password for IAM administrator - IMPORTANT: this flag is deprecated
    iamAdminPassword: ""
    #
    # Password for IAM Auth Proxy
    iamAuthProxyClientSecret: ""
    #
    # Client Secret for IAM SDK
    iamSdkClientSecret: ""
    #
    # Password for IEM administrator
    iemAdminPassword: ""
    #
    # sets the passwords of initial users as temporary
    temporaryPassword: false
  output:
    #
    # Print out initial user passwords?
    printPasswords: true
The template file contains default values which must be changed by the operator. The ieprovision CLI generates a template with random pre-fill passwords.
The IP address of the cluster or DNS name must be used for the hostname in the template file.
The IEM Pro is installed using the IEM instance configuration file and the completed template file:
```bash
ieprovision install <configuration-file.json> --values template.yaml
```

!!! note "You can request additional information by using `-v` and `--log-config`."
You can also manually install the IEM in the Kubernetes cluster. The parametesrs are the same as for the installation using the template function.
Install the IEM on the K8s cluster using ieprovision install:
Example install
ieprovision install <config> \
    --set global.hostname=<hostname or ip> \
    --namespace iem \
    --set global.storageClass=<storageClass> \
    --set global.storageClassPg=<storageClass> \
    --set global.certChain="$(cat <path-to-iem-certificate[.crt]> | base64 -w 0)"
You can request additional information by using -v and --log-config.
| Parameter | Explanation | Example |
|---|---|---|
| configuration-file | You need to enter the path to your iem-configuration-file | ./configuration-1a457v7cjndhvhjcn843.json |
| --set global.hostname | Enter the public IP of your cluster | 192.168.49.2 |
| --namespace | Namespace of your IEM | iem |
| --set global.storageClass | Storage class of the IEM cluster (show all volumes with kubectl get storageclass) default value is standard |
standard |
| --set global.StorageClassPg | Storage class Postgress of the IEM cluster (show all volumes with kubectl get storageclass) default value is standard |
standard |
| --set global.certChain | Path to certificate of the IEM [.crt] | ./gencert/our/myCert.crt |
Configure Users and Passwords for the first Installation
There are a few configurations available for the user, to manage the users and their respective passwords. Please consider the proper configuration before performing an installation, this will allow a better compliance with your company policies.
Relevant User and Password configuration are the following:
| Parameter | Description | Default |
|---|---|---|
| --set output.printPasswords | Prints out the passwords to the console, after a successful installation | true |
| --set global.temporaryPassword | Set all the initial passwords as temporary, note that if you enable this action, a manual first login is necessary | false |
| --set central-auth.keycloak.initialUser.enabled | Creates a first IEM Pro user with the role Admin | true |
Note The configuration here mentioned are available from the chart version v1.3.61 onwards.
Configuration Example for Single User to manage IEM Pro and IAM
This template configuration is an example of the minimum configuration required, to perform an IEM Pro installation that has a one user, with rights to manage both IAM and IEM Pro.
central-auth:
  keycloak:
    customerRealmAdmin:
      #
      # Email of the initial IEM admin
      email: root.admin@example.com
      #
      # first name of the initial IEM admin
      firstName: root
      #
      # last name of the initial IEM admin
      lastName: admin
      #
      # username of the initial IEM admin
      username: root_admin
    initialUser:
      # Enable creation of the initial IEM user
      enabled: false
global:
  # Password for Customer Realm Admin
  customerAdminPassword: "abc@ABC.123"
  #
  # sets the passwords of initial users as temporary
  temporaryPassword: false
output:
  #
  # Print out initial user passwords?
  printPasswords: false
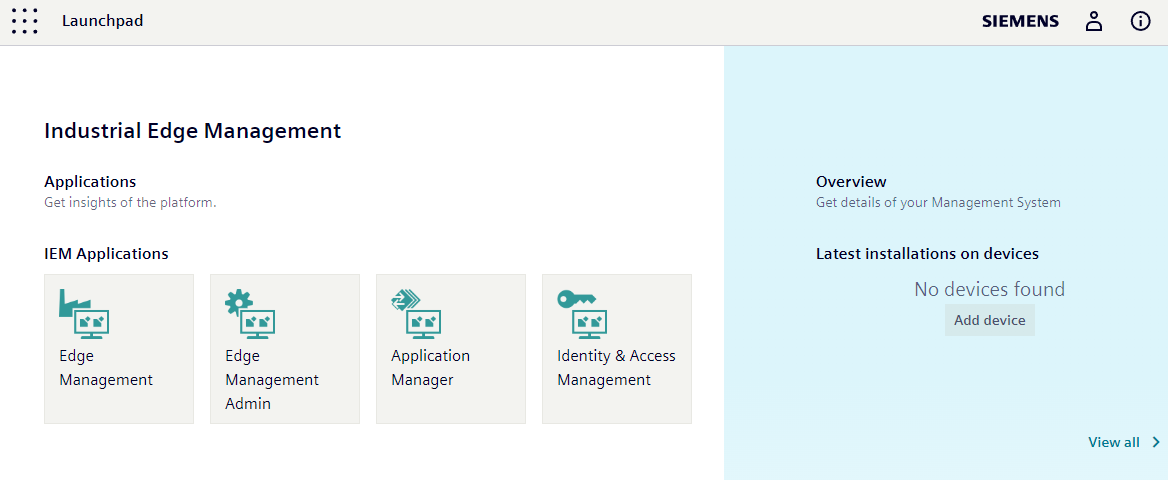
IEM Pro Deployment
Deploying the IEM takes some time. If the deployment is successful, the given hostname will be redirected to the login page of Keycloak. The Launchpad is the single point of entry after the login and is used to launch the IEMA or the IEM Admin Management, for example.
Also, upon successful deployment of the IEM Pro, three Keycloak users are automatically created and displayed: KEYCLOAK_ADMIN, KEYCLOAK_CUSTOMER_REALM_ADMIN, and KEYCLOAK_USER. For more information about these users, see [Keycloak]](../../../operation/iam/01_overview.md).
Credentials are printed out in the terminal and can also be viewed using the
helm notecommand. Change the initial credentials after setup. Enable 2FA authentication for administrative users. Use the--set global.temporaryPassword=trueflag to force the password change for initial users.